
Level: Beginners
Scenario: You have a list in SharePoint that contains user data (profile including name, phone, etc). You have an InfoPath form that has a text box to enter a user ID and a button to show record against the User ID entered in the text box.
Being a developer, a programmatic solution is very easy for me. With a few lines of code I can extract filtered data from a SharePoint list. What about those who are not SharePoint programmers! This tip will give you an easy solution.
1. Add a new data connection in your form.
Step by Step
|
1. Click "Manage Data Connections" in "Design Tasks". This will open a "Data Connections" box.
2. Click the "Add" button.
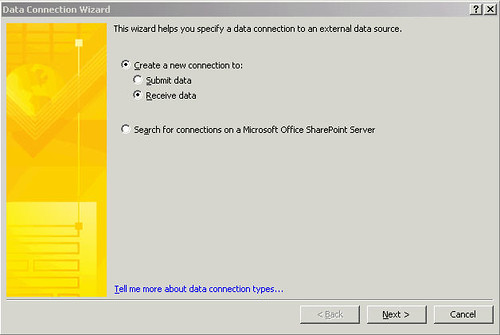
3. Select "Create a new connection to" option and then select "Receive data" option. Click "Next".
4. Select "SharePoint library or list" and click "Next".
5. Enter the URL of the list that will be used to fetch data from. Click "Next".
6. Select list from the available lists and libraries and click "Next".
7. Select the fields that you want to show in the form and click "Next". If you intend to use the form in Offline mode (that is when you are not connected to the SharePoint), then select the option "Store a copy of the data in the form template" otherwise do nothing and click "Next".
8. Enter a name for this new data connection and select "Automatically retrieve data when form is opened" and click "Finish".
9. Click "Close".
|
2. Display data in your form. Suppose you want to show a single field/column in your form. Follow the instructions below to show a single field.
1. Add a data source (type: string).
2. Right click the new data source and select "Properties".
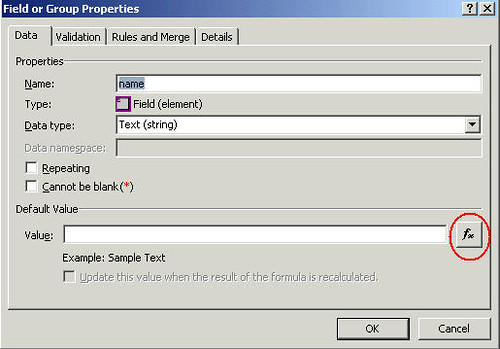
3. "Data" tab is selected by default when your open the control's properties. Click the function button (fx) that is located on the right side of the "Value" field.
4. Click "Insert Field or Group." button.
5. Select the data connection that you created in the first step from the "Data Source" drop down.
6. Expand nodes unless you can see all field/column names. Select the column name that you want to show in your form. As I said earlier, we are assuming that we are retrieving user profile data from a SharePoint list and this data will be filtered by a value passed from the InfoPath form. As I mentioned in the scenario above, there is a field that will contain a User ID entered by the user. So after you select the value that you want to show on your form, click the "Filter Data." button. This button remains disabled unless you select a field.
7. Click "Add" button.
8. There will be three drop down boxes on the form. The first drop down will have the column names retrieved from the SharePoint list and by default the column name you selected in the previous step will be selected in the drop down. The second drop down contains the filter conditions. Keep the default condition selected, that is, "is equal to". In the third drop down, Select "Type text ." if you want to hard code the user ID against which you want to show the data. If you want to keep it dynamic then select "Select a field or group.".
9. From the "Data Source" drop down, select the main data source and then select the field name that corresponds to the "User ID" text box on your form. Click "Ok" and then again click "Ok". Click "Ok" thrice more to close open boxes and then click "Ok" once more to close the main properties box.
10. Drag and drop the data source to your form. Save the form and run it to view the preview. (Hint: If this is a web enabled form, make sure to set the postback settings of the control that will show data to "Always".)
Repeat the steps above for each new field added to your form to show the SharePoint list column data.
|