

TechnoService is a web service that gets your site or blog information from Technorati using the Technorati API. This web service was written for MOSS 2007 and WSS 3.0.
This functionality is also available in the form of a web part.
The service returns a string that has following information:
1. Blog/Site Name
2. Author Name
3. Number of Inbound Blogs
4. Number of Inbound Links
5. Blog/Site Rank
2. Author Name
3. Number of Inbound Blogs
4. Number of Inbound Links
5. Blog/Site Rank
I thought I would create an installer for this web service but unfortunately I couldn't find the time. I created an installer for the WSUploadService and it was so easy to install the web service on the server. May be, if I got some time during the next week, I will try to create an installer for this service as well but for now, you will have to deploy it manually.
You may want to read a comprehensive article that shows how to create and deploy web services for MOSS 2007 and WSS 3.0. Click here to read the article.
Installation
1. Download files.
2. Unzip the downloaded file to a local folder on your machine (SharePoint server).
3. Copy the following files from the folder (where you unzipped the package) to the _vti_bin directory of the SharePoint server.
Techos.asmx
Technosdisco.aspx
Technoswsdl.aspx
The _vti_bin virtual directory maps physically to the Local_Drive:Program FilesCommon FilesMicrosoft SharedWeb Server Extensions12ISAPI directory, which contains the default Web service files used in Windows SharePoint Services.
To include the Web service in the list of web services on the server
4. In Notepad, open the spsdisco.aspx file. spsdisco.aspx is located in the following directory (on the SharePoint server):
Local_Drive:Program FilesCommon FilesMicrosoft Sharedweb server extensions12ISAPI
5. Add the following lines to the end of the file within the discovery element (paste these lines just before the </discovery> element) and save the file:
Note: Please paste these lines to the notepad first to avoid copying the illegal characters or copy these lines from the spsdisco.aspx file (compressed as a zip file).
<contractRef ref=<% SPHttpUtility.AddQuote(SPHttpUtility.HtmlEncode(spWeb.Url +
"/_vti_bin/Technos.asmx?wsdl"), Response.Output); %> docRef=<%
SPHttpUtility.AddQuote(SPHttpUtility.HtmlEncode(spWeb.Url + "/_vti_bin/Technos.asmx"),
Response.Output); %> xmlns="http://schemas.xmlsoap.org/disco/scl/" />
<soap address=<% SPHttpUtility.AddQuote(SPHttpUtility.HtmlEncode(spWeb.Url +
"/_vti_bin/Technos.asmx"), Response.Output); %>
xmlns:q1="http://schemas.microsoft.com/sharepoint/soap/directory/" binding="q1:TechnosSoap"
xmlns="http://schemas.xmlsoap.org/disco/soap/" />
Copying the assembly to the Bin folder
6. Copy the techno.dll file to the bin folder of the default SharePoint web application. Following path contains the virtual directories of web applications that you have created on your SharePoint server.
Local_Drive:InetpubwwwrootwssVirtualDirectories
Local_Drive:InetpubwwwrootwssVirtualDirectories
If your default web application is configured at port 80 then you should copy the techno.dll file to the following folder:
Local_Drive:InetpubwwwrootwssVirtualDirectories80 in
It is up to you, you may want to install the web service in some other application. For example, if you want to install it in an application configured at port 81, then copy the techno.dll to the following folder:
Local_Drive:InetpubwwwrootwssVirtualDirectories81 in
Adding web service to the GAC
7. Go to following folder:
LocalDrive:Program FilesMicrosoft Visual Studio 8SDKv2.0Bin
and run the following command:
gacutil.exe -i "<Full file system path to Techno.DLL>".
Testing the Service
You can test the service in a windows application. Create a C# Windows application. Add a web reference to the web service that you just installed and use following code to test the service:
private void Form1_Load(object sender, EventArgs e)
{
try
{
localhost.Technos o = new localhost.Technos();
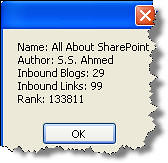
MessageBox.Show(o.DoTechno(@"/ssa", "ec789b5b3ad9a6d0acd5e4a0d52591ee"));
}
catch (Exception ex)
{
MessageBox.Show(ex.Source + " - " + ex.Message + " - " + ex.InnerException + " - " + ex.StackTrace);
}
}
{
try
{
localhost.Technos o = new localhost.Technos();
MessageBox.Show(o.DoTechno(@"/ssa", "ec789b5b3ad9a6d0acd5e4a0d52591ee"));
}
catch (Exception ex)
{
MessageBox.Show(ex.Source + " - " + ex.Message + " - " + ex.InnerException + " - " + ex.StackTrace);
}
}
DoTechno() method takes two arguments: url and key. Url is the url of the site or blog for which you want to retrieve the information and key is the key that is required to use the Technorati API. You can get the key by visiting the Technorati site. The code shown above will return following information:
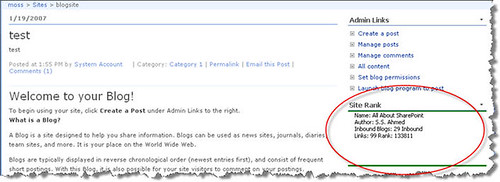
I deployed this web service on my SharePoint blog site using the SharePoint designer. You can create a web part of your own to consume this web service, format the output by adding some style and display it anywhere in your SharePoint sites. The other method, as I said earlier, is to use the SharePoint designer.
Deploying the web service using SharePoint designer
1. Open a SharePoint site (Where you want to deploy the web service) in SharePoint designer.
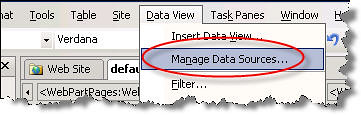
2. Select Manage Data Sources... from the "Data View" menu. This will open the "Data Source Library" pane on the right side.
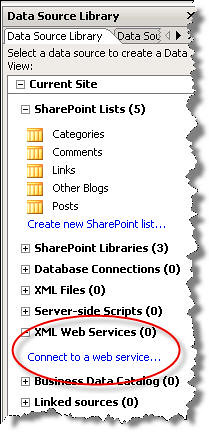
3. Expand the "XML Web Services" node and click Connect to a web service.
4. Enter the web service reference in the Service description location. If you installed the web service in the root application then the path will look like this:
http://localhost/_vti_bin/technos.asmx?wsdl
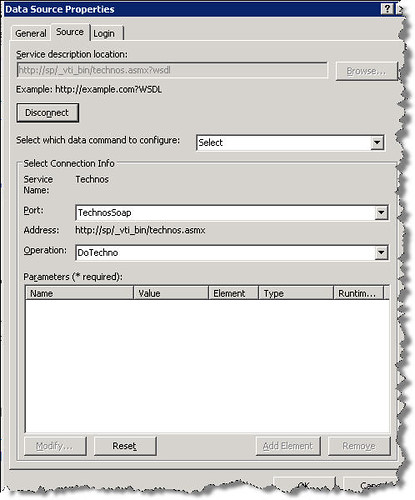
Leave all other options as they are and click the OK button.
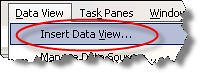
5. Select Insert Data View... from the "Data View" menu. This will add a data view web part to the page.
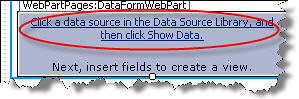
6. Click the link shown in the data view web part. This will open the Data Sources Library if it's not already open.
7. Right click the web service that you added to the "XML Web Services" node in the "Data Sources Library" and click Show Data.
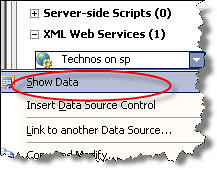
Data returned from your web service will be displayed.

8. Click the Insert Selected Fields as... drop down and select Single Item View.
9. That's it. Save the page and if you want to add some style to the data view web part, right click the data view web part and select Modify > Table AutoFormat. It will show you several options. Select the option of your choice and your data view web part is ready.

You can apply formatting to the output returned by the web service manually as well. Anyway, here is how the data view web part looked in my SharePoint site after applying some styles:
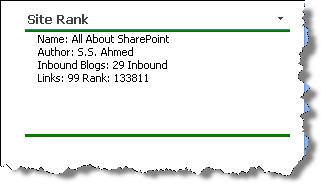
I changed the title and applied auto formatting.
---------------------------------------
Update:
Originally posted: Tue, Feb 27, 2007
Reposted: Aug 26, 2007
Some of the links might not work as this version was retrieved from a web archive. If you find any dead links, kindly send an email to share.point@yahoo.com with the URL of this page. Thank you!
-------------------------
No comments:
Post a Comment